Organized Image Library
How to Create an Organized Image Library for your Business
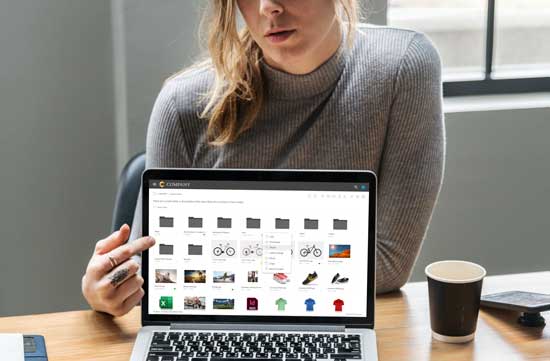
Visual content marketing is one of the biggest marketing trends you can embrace to attract customers and grow your online business. While visual content varies from videos to blog infographics—digital images are the most important visual assets marketers use within their content strategy.
Statistics suggest that Facebook posts with images deliver 2.3 times more engagement than posts without images, and articles with images after every 75-100 words receive 2 times the social media shares than those with fewer images.
However, maintaining your image library can get challenging as you grow and expand.
Right from branded images, infographics, screenshots, and visuals for landing pages to memes and presentations—storing everything in one place isn’t an ideal solution. Without organizing the images, it will take hours for you and your team to find the image they're searching for—making the process more tedious than seamless.
Image library organization plays a critical role in decluttering your digital storage, organizing a library of images and creative assets, saving time, and helping your team maximize their productivity.
In this article, we'll cover how exactly you can use an organized image library for your organization. But first, let’s briefly understand what an image library is and why it's so important.
What’s an image library, and how does it help?
An image library or digital image storage is a cloud-based storage application that ensures a centralized and secure solution for storing, managing, organizing, and distributing images.
You can think of it as an image catalog that makes it easy to publish, manage, store, and archive many digital images quickly with no hassle.
Hence, with such a vast collection of images in your image library—it becomes more than necessary to organize the images based on different criteria like social media campaigns, dates, or blog posts.
This process of storing, organizing, searching, sharing, downloading, and archiving images in your image library is image management.
Here are the top benefits of organizing your image library:
- Helps find images and other assets easily: An organized image library makes finding the right images a breeze for marketing activities and launch campaigns.
If organized properly, you can find images by name, date, keywords, locations, and categories in seconds—in a secure cloud-based environment.
- Reduces error margins for your business: When you upload images to your website’s HTML, it’s important to create a correct path to your directory structure’s location where those images reside. In simple terms, the folder path that leads to the images and their names should be correct for the images to load properly on your site.
An organized image library with accurate folder and image names eliminates this risk—ensuring a quality customer experience.
Many software solutions like Digital Asset Management (DAM) tools, like IntelligenceBank Digital Asset Management and pCloud, help you maintain up-to-date images with correct naming conventions in your image library—reducing the risks of margin errors and lost sales.
- Improves team collaboration and productivity: Whether your new marketing campaign involves hundreds of images or tons of videos— maintaining assets in a central location in an image library can help improve collaboration between cross-functional teams.
Now that you know the benefits of an organized image library let’s look at some best practices to maintain it.
Best practices to organize your business’s image library
While organizing your image library provides several benefits—the process might seem daunting, especially figuring out where to start from exactly.
Here are some tips and practices you can use to organize your business’s image library in a hassle-free manner.
1. Locate all images and begin with the most popular ones
One of the most time-consuming tasks is remembering where you’ve stored all the images—whether in a couple of hard drives, memory cards, email inboxes, or your local cloud storage. Thus, the first and most crucial step is to figure out all the possible image locations and assemble your assets in a centralized storage solution. However, this is easier said than done.
So, the trick is to start small. Start with locating the images you use daily—including your business’s logo or an image that captures your business’s mission.
If you’re starting from a clean slate and creating a brand-new cloud-based image library—focus on your most used images to avoid the clutter and get used to the new system.
Once you’re comfortable and familiar with using your image library—you can dig into your email inboxes and hard drives to fill out the rest of the images and archive.
2. Trim down your digital library
To ensure that you keep your image library as organized as possible—delete all the unnecessary images that aren’t simply upto the standard.
These images include images with poor focus, duplicates, corrupted images, unsalvageable exposures, or smaller or larger-sized images. This will take the load off your image library and make it easier for you and your team to find what you came looking for.
3. Use a standard file and folder structure
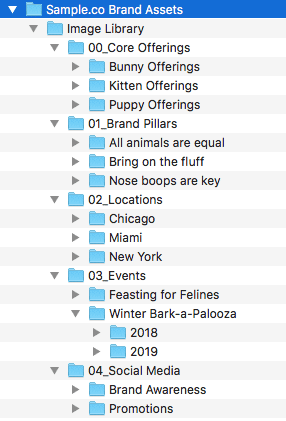
The next step is to determine your image library’s needs, goals, and categories of choice into which you wish to break down your library’s files and folder structure. Again, the possibilities are endless—you can sort by client names, years, chronological dates, or the purpose of images.
For instance, you can start by creating folders for years, months, and then different marketing campaigns you worked on in that month and save images of that particular campaign in its respective folder. You can also decide whether you want to save an original and edited or latest copy of images in standalone folders or together.
In the end—it all depends on your preferences and image-specific needs. However, when creating a folder structure, ask yourself these questions:
- Is this folder structure clear enough to make finding priority images easy through standardized folder names?
- Will this folder structure make it easier for my team members to quickly sort through and find visual assets?
- Will this naming convention and system keep working as my image library grows?
If you said "yes" to these questions, your image library would be a fit to serve your organization's needs as it grows.
4. Rename your files strategically
Once you‘re through finding and creating the best folder structure for your image library, coming up with a strategic and uniform file naming system is the next crucial step.
With this step, you can add additional and specific image details to make image search easier by performing specific manual searches.
For instance, if you need to rename images from different social media campaigns you conducted in 2020 for a client—you can rename an image as "2020>ABC Agency>Instagram>more clicks on CTA.
Such strategic and specific image naming conventions will help you and your team instantly find the images you’re looking for with no hassle.
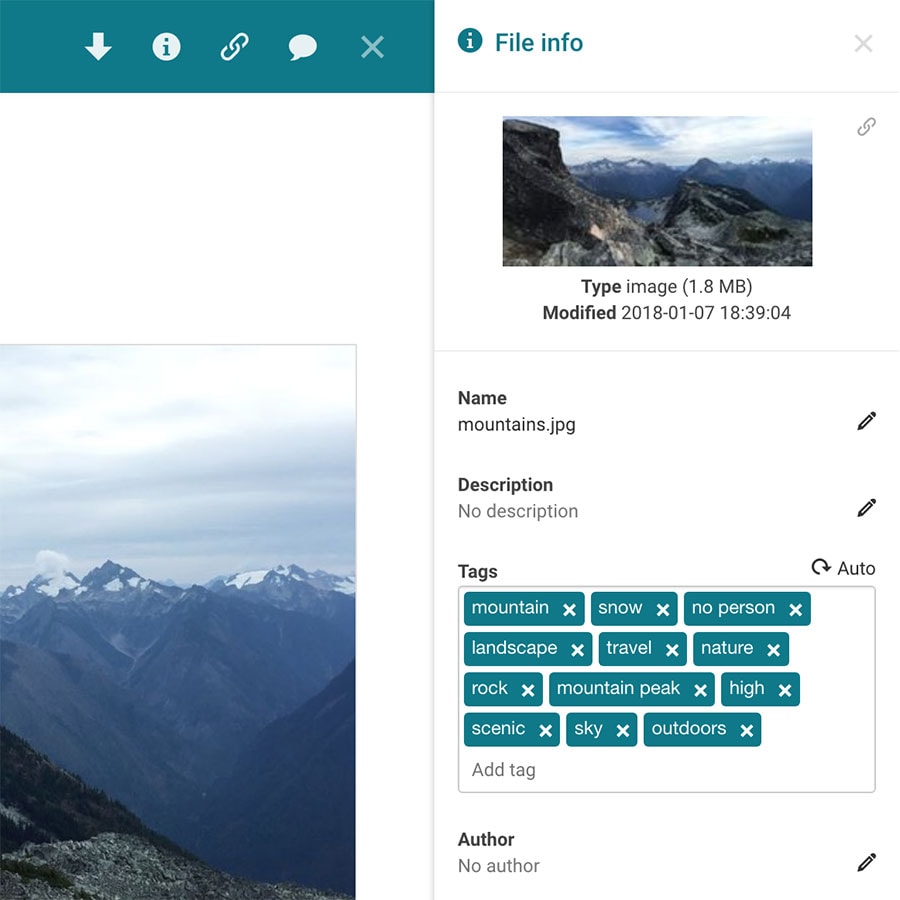
5. Leverage metadata management
Besides using consistent image naming conventions—it’s also important to ensure you’re using consistent metadata rules.
Metadata holds the information about your images and makes your image library more searchable—allowing you to search images based on relevant keywords.
For instance, if you need to find an image in your library that consists of interviews—you can search for terms like candidates, hiring, job, meeting, or experience to retrieve the image.
However, the power of metadata management extends further than just keywords or a few tags on the images. You can also find images based on other critical bits of information—including date, owner’s name, location, usage rights, version, and size.
Metadata will embed some of this information in the files—while you’ll need to add other relevant information manually, including keywords.
Pro tip: Whatever keywords you wish to include in the metadata, ensure you document the rules and use consistent terminologies, so every team member is on the same page.
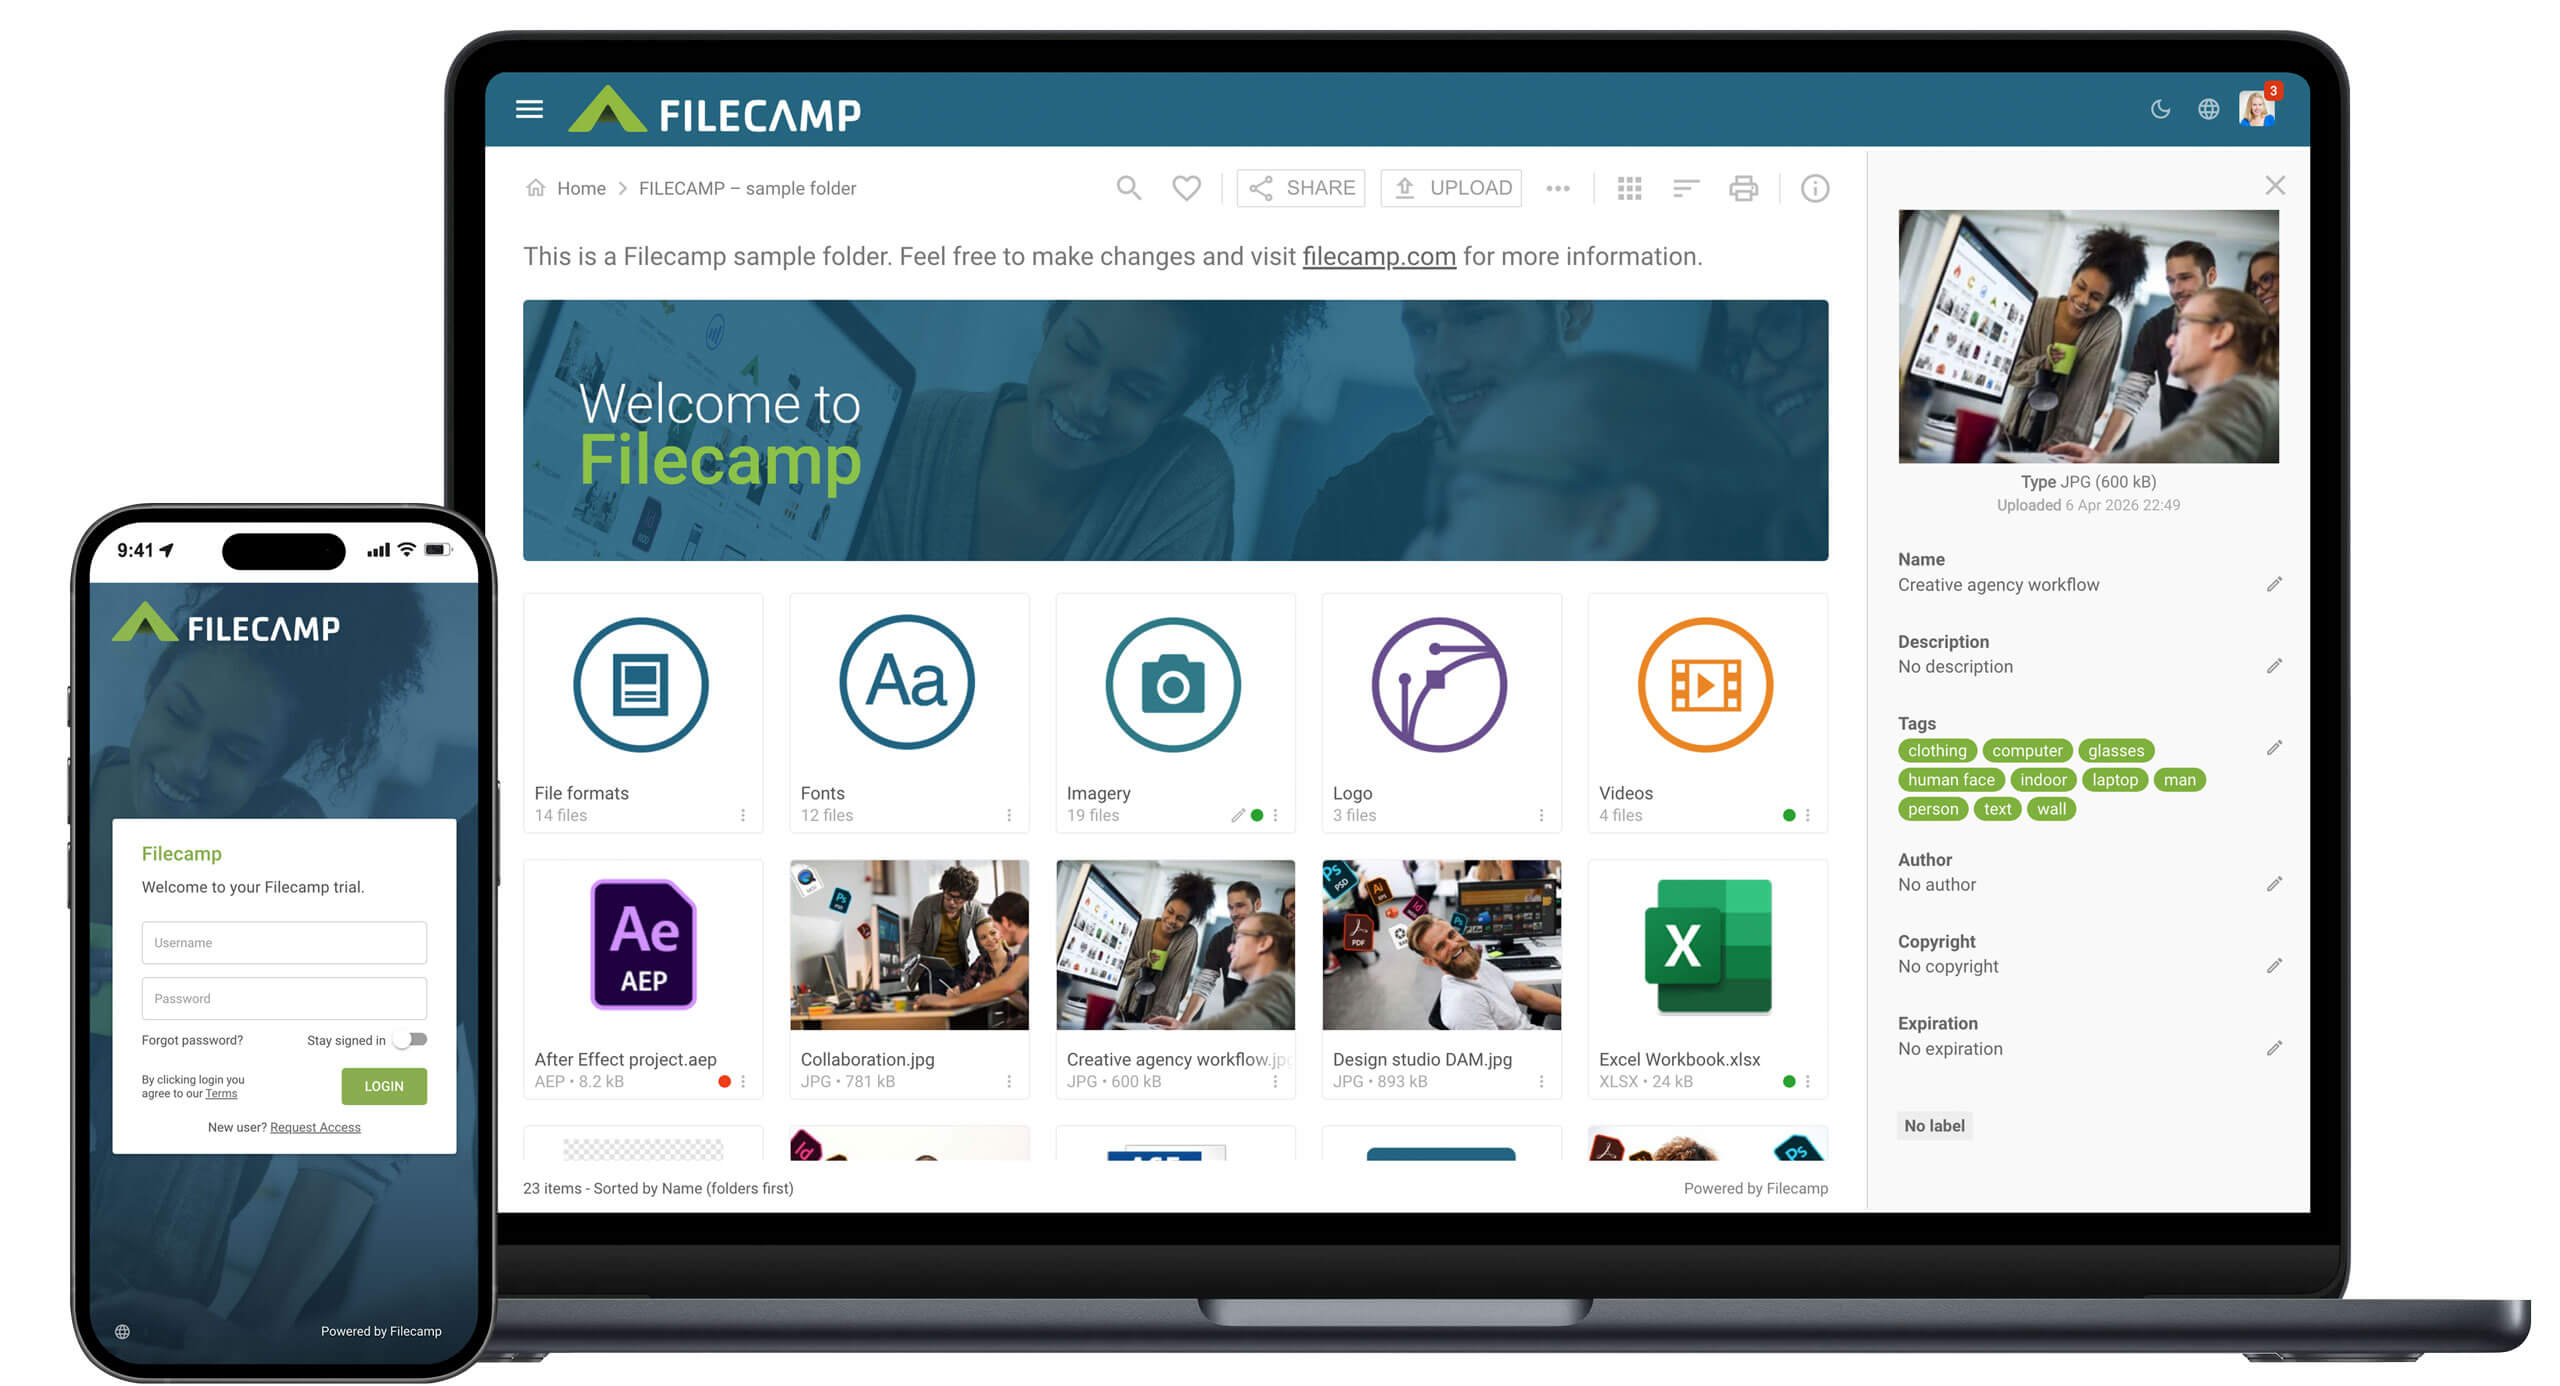
6. Use an auto-tagging software
Building upon the strength of metadata management—auto-tagging software, such as Filecamp, Air and Exif Pilot, automatically labels and tags images in your image library. Hence, it automates keyword generation and processing to organize your image library.
You could do this manually too, but it’ll eat up a significant chunk of time. Here, an AI-backed auto-tagging software will not only save you time—but make the process much more efficient.
It will also ensure the correct and accurate labeling of images in your library, allowing you to find relevant images quickly based on the image’s details, especially when the deadlines are nearing, or you want to swap an image asset instantly.
So, use an auto-tagging software that uses image recognition to automate this process and boost your image library’s functionality.
7. Utilize cloud storage systems
Cloud storage solutions, like Filecamp, Mega, iCloud, and Box, let you store and manage your images online on servers—instead of external offline devices like hard drives or pen drives.
It helps you free up plenty of space on your personal computers and devices and provides an excellent way to organize images for future access and sort them for quick image retrieval.
Moreover, several cloud systems, including Google Drive, add added security for your files—allowing you to set access file permissions and flexibility to control who can view, edit, or access images within your library. This security is beneficial when you wish to share the images with specific team members who require it—instead of sharing the library with every member of your team.
Thus, if you need a solution for immediate access to images at any time—cloud storage for an image library is an ideal and secure solution.
8. Schedule regular image backups
Relying on a single on-premise image library isn’t a wise decision.
Hardware devices like computers can crash, get stolen, or even get damaged. Thus, by just relying on them, you stay at risk of losing all images at once. Here, using multiple image libraries ensures better segmentation and cross-functional collaboration by giving you access to grant and control permissions.
So, besides backing up your library to external hardware or drive — here are some of the other library backup solutions you can use for your image library:
- Software library solutions, such as iPhoto Library Manager or Network-attached storage (NAS).
- Multiple cloud solutions, such as Filecamp, Google Drive, Dropbox, or Microsoft OneDrive.
- Free cloud photo services, such as Adobe Creative Cloud, Picturelife, and ThisLife make it easy to backup images from any desktop or mobile device with an additional layer of security and tools required to edit and organize your image library.
- Services like Carbonite, CrashPlan, and Livedrive—securely backing up your entire desktop systems, including image libraries, daily without user interaction.
So, try out these backup options and choose a suitable solution to ensure a reliable and updated backup of your organized image library.
Conclusion
As a successful blogger and marketer, finding the ideal way to organize your image library is important, especially as you take on more work, learn more skills, work on more campaigns, and grow your digital library.
An organized and well-structured image library significantly cuts down the effort and time required to find specific images, giving you greater accessibility, improving productivity, and facilitating team collaboration.
So, use the tips mentioned above to create an organized image library to reshape your business workflow, streamline processes, and maintain an up-to-date and clean image library.

Alex Garcia
Share this Post